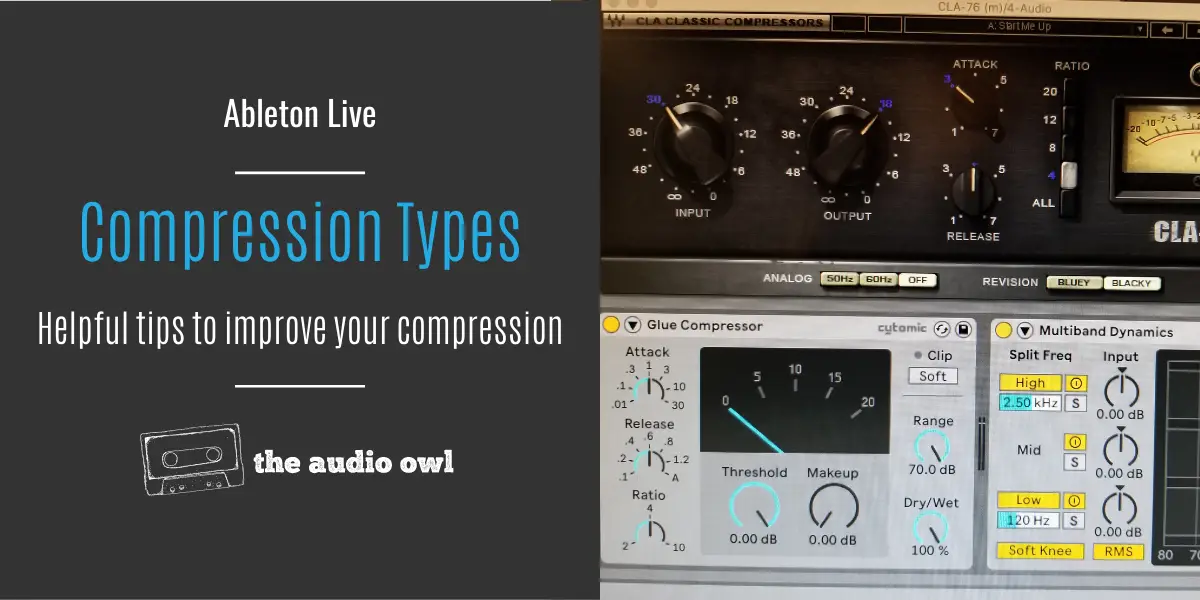
Compressors are one of the most useful tools we have as music producers. Their main use is to compress incoming audio to help a track fit better within a mix. While there is a wide variety of audio compression types, the way they work is very similar.
Producers, being experimental in nature have found many ways to use compression. In this article, we are going to talk about some useful compressor techniques. These types of compression will make your mix sound ten times more professional!
Sidechain Compression For Pumping
Probably the most used technique in existence, sidechaining helps make room for instruments. It does this by ducking the sound of one track when triggered by the audio from another track. The pumping effect you hear in electronic music is created using sidechain compression.
Almost every compressor has a sidechain feature, but we are going to talk about the Ableton Live compressor.
What this technique does is simply create an envelope using the audio waveform of another channel. The envelope will then lower or boost the volume of the channel the compressor is sitting on.
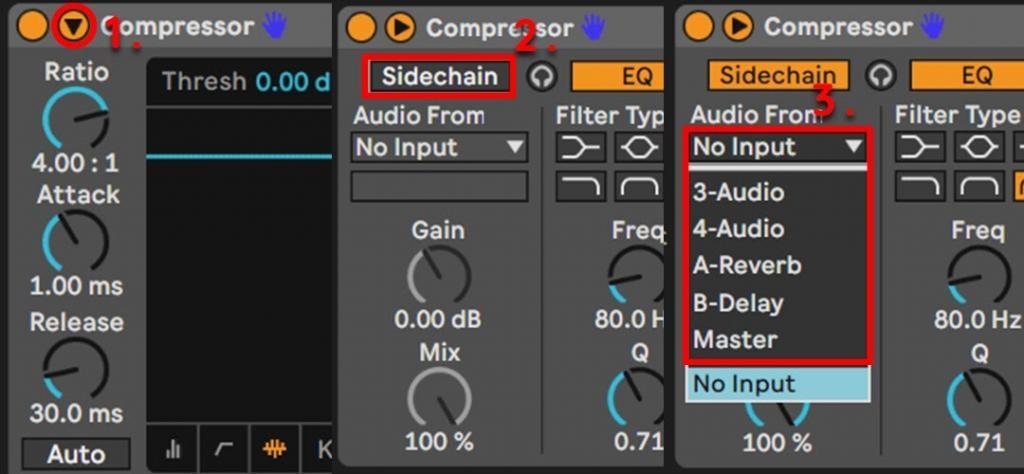
To use this technique you need to enable the sidechain function of your compressor.
After you enable the sidechain function select which channel in your DAW is going to feed the compressor.
Now you can use the threshold control to specify how much of the sidechain effect you want to be used.
Look at the Activity View you can see the waveform of the incoming audio and the envelope the compressor creates. By adjusting the attack and release you can change the shape of the envelope.
Adjusting the Ratio knob sets the intensity of the duck. With the ratio set to infinity, the duck is at its most intense. When set lower the duck is less intense.
Sidechain Compression can either lower the volume or you can expand the audio above 0db.
Parallel Compression For Drums
This is a very popular technique when mixing drums. It can add life and body to your drum tracks! You can use this technique with any instrument. It’s also an awesome way to make your vocals cut through the mix.
To use parallel compression you need to combine the uncompressed dry signal with the compressed signal. By doing this you can dial in extreme settings without totally destroying the dynamics of your track.
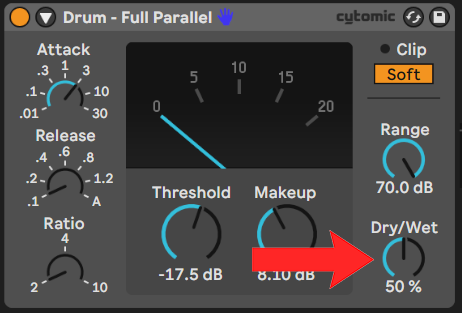
Most compressors have a dry/wet knob and this is perfect for doing parallel compression. You don’t need to create a separate track to feed your dry signal and another one for the compressed signal.
For this example, we are going to use Ableton’s Glue Compressor. Set the dry/wet at 50% and dial in some settings.
Start by dialing in medium settings with a low ratio this will usually result in a “glued together” sound.
Pushing the settings to the extreme will really squash your sound. When you combine the squashed audio with the dry audio via the dry/wet knob both sounds are blended together.
Using Compression On Vocals
When it comes to vocal processing the compressor is at the forefront and is the most important tool.
Vocals typically are very dynamic in volume and we want to reign in that range. This helps the vocals sit front and center in the mix.
Before you put the compressor in your chain you should analyze the vocal take. Find out if you can hear every word, are there any unwanted pops and peaks? What is the loudest part and what is the softest part of the vocal take?
After you analyze the track you can drop your compressor into the channel and start dialing in some settings.
The way you want to set up your compressors for vocal processing is to keep your settings medium. Attack and release are where you’re going to spend the majority of your time.
When you are happy with the settings you dialed in you can go ahead and boost the compressor’s makeup gain. Boosting will bring back some of the levels you lost from the processing.
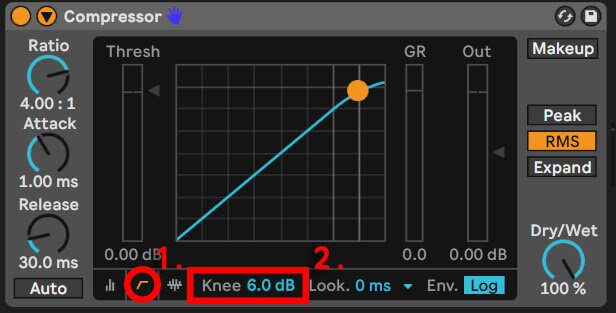
As useful as compressors are sometimes you can hear that unnatural clamping sound when the compressor hits the designated threshold. When you work on a soft track this might not be the best sound.
To fix this, you should dial in a soft knee in your compressor. With a soft knee, the compressor will ease into the compression and the result will be a more transparent compression.
OTT Compression (Over The Top)
Some would call this form of compression a cheat code for a better mix.
OTT stands for “over the top” and the settings dialed in are extreme. OTT compression uses a multiband compressor. These are compressors that split the frequency spectrum into three bands: low, mid, and high. Each band leads to a compressor with dedicated controls per band.
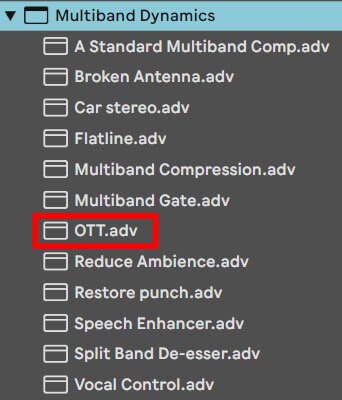
The OTT compression method started in Ableton with the infamous “OTT” preset for the Ableton Live multiband compressor.
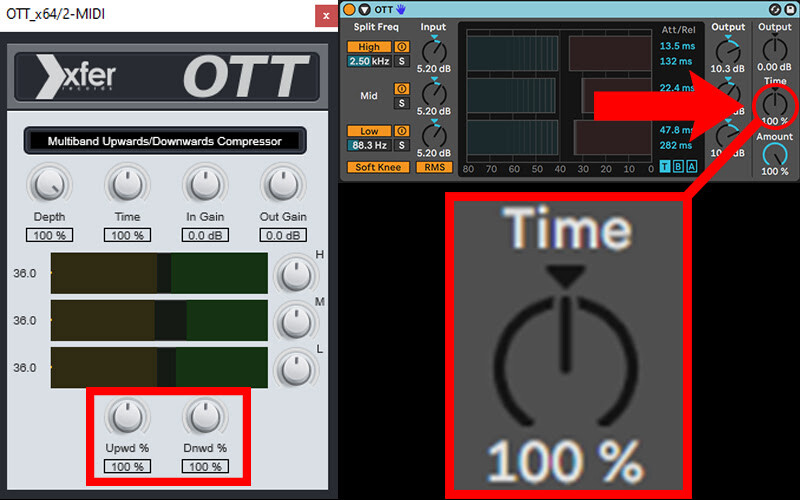
After gaining popularity in the EDM scene a company called “Xfer” designed a VST plugin based on the original. The plugin can be downloaded here for free.
By combining multiband compression with upwards and downwards compression you get a signal that is fuller, cleaner, and louder.
This type of compression totally crushes a sound, but the results are definitely worth it.
When working with OTT compression you should keep in mind that 100% is not the best setting. Instead, you should lower the depth and find a balance in the middle ground.
OTT can also work as a transient shaper. When using the Xfer plugin imagine the upwd and dnwd knobs as attacj and release. When using the Ableton Live OTT preset you can use the time knob to shape transients. By moving the knob left for a squashed sound or right to bring out the transients.
Boosting the input gain will squeeze your audio into a sausage shape. But lowering the gain will keep your transients intact while at the same time give you that nice OTT sound.
Author: Nadir
Hi there, my name is Nadir aka Nadrisk. I’ve been a bedroom music producer for 8+ years. I do everything in the box and I use Ableton Live as my weapon of choice. Apart from music production, I do mixing and mastering, audio/video editing, and sound design.
Listen to Nadrisk Here


