The music industry has come a long way and so has the advancement of music technology. Almost all great hardware devices now have counterparts in the digital audio workstation. The vocoder is a great example of this and in this article, we’ll take an in-depth look at the Vocoder in Ableton.
Before discussing how to use the vocoder in Ableton, it is helpful to know what a vocoder is!
What is a Vocoder?
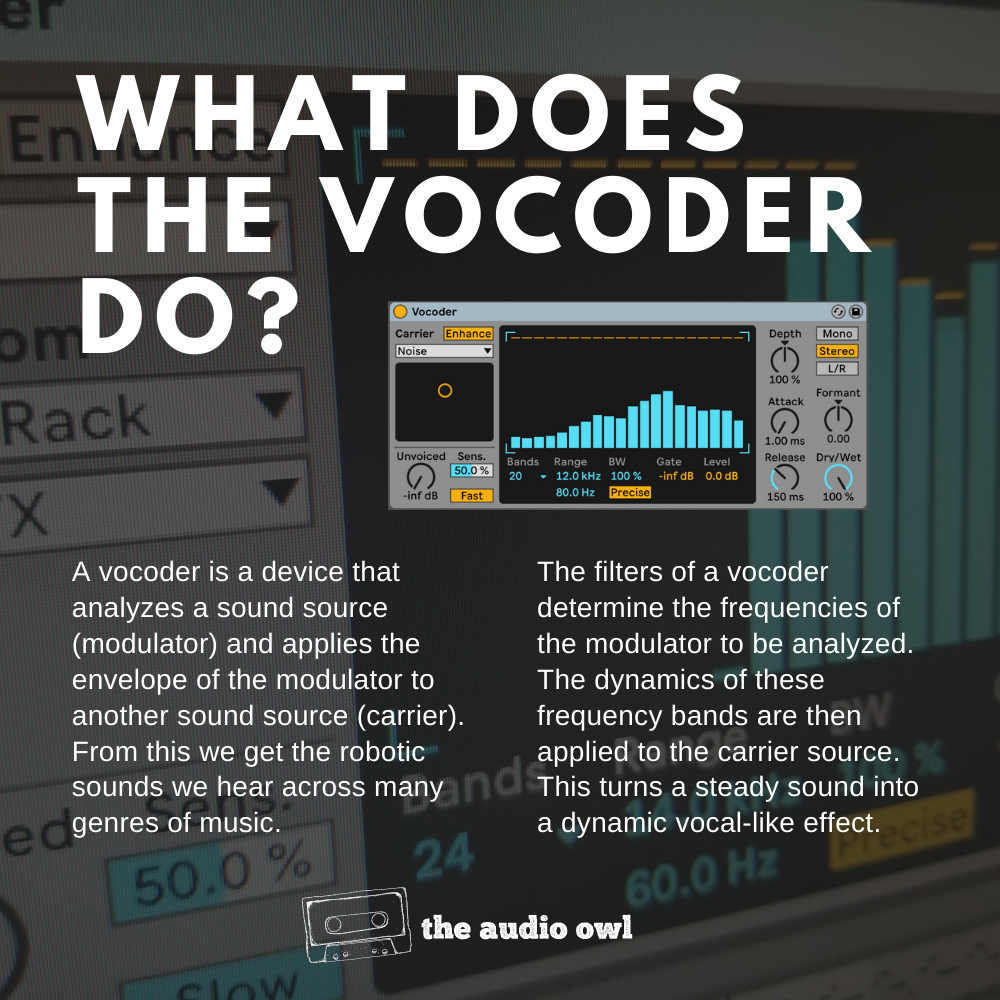
A vocoder is a device that analyzes a sound source (modulator) and applies the envelope of the modulator to another sound source (carrier). From this we get the robotic sounds we hear across many genres of music.
Vocoders were originally made in 1928 and the main use was reduce the bandwidth of the human voice. Lower bandwidths decreased the output of the voice significantly and allowed the messages to transfer over large distances. Vocoders were largely used for sending encoded messages during the second world war. Later on, they slowly paved their way to EDM and now vocoders have become a huge part of any music production software.

What does vocoder sound like?
Like any other synthesizer, vocoders are not limited to producing one sound.
They are mostly known for the iconic robotic sound effects and if you are familiar with Daft Punk, you know what we mean. But still, vocoders are not just limited to vocals. They can be used with many different types of instruments or sounds.
How does a vocoder work?
A vocoder works using two sound sources. The carrier is used to provide harmonic richness to the sound. The modulator is used as an envelope source.
The Carrier
A carrier signal is usually something that is harmonically rich. This means that there is a pretty good amount of volume across the whole frequency spectrum.
The Modulator
A vocoder will analyze the dynamics of the modulator and use that signal as an envelope for the effect. Think about it like a gate for the carrier.
A modulators signal is split up into the frequency bands of the vocoder. Each frequency band measures the dynamics of the modulator. This produces the envelope for the carrier to follow.
The Filter Bank
Filter banks are said to be the backbone of the vocoders where the sounds are split into different bands of frequencies. The frequencies that are similar in the range are mapped together so that the original sound retains the base structure.
Let us take an example, if a modulator gets a kick drum as an input, the lower frequencies of the carrier will be mapped onto it.
The number of filters corresponds with the quality of the result. The higher number of filters will yield the best possible results from the vocoder.
The most common example for vocoder is a synth and a voice but you always have the option to experiment and feed different input to the modulator and carrier.
Ableton Vocoder
When it comes to digital music stations, Ableton needs no introduction. It’s popular and one of the best DAWs available for windows as well as the Mac OS.
As we were talking about Vocoders, Ableton offers us a powerful digital vocoder that has all the features a vocoder should have. You’ll find Ableton’s Vocoder in the Audio Effects library in the browser pane.
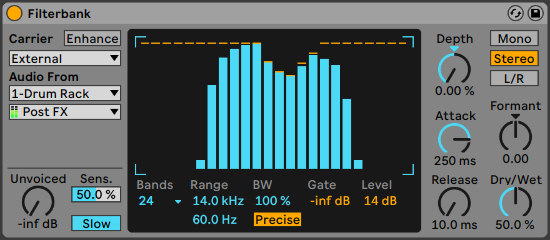
Ableton Vocoder comes with many controls that allow the music creators to shape the sound according to their needs. The vocoder in Ableton Live looks as follows.
Let’s explore the controls and parameters available with the vocoder.
Enhance: Located right next to the carrier selection, the enhance button will normalize the signal of the carrier across the frequency spectrum. This enhances the effect of the modulator envelope over the carrier source.
Filter Bank: Tons of filters allow us to have complete control over the frequencies. We can raise or lower the level of the bands in the drawing window.
Formant: It is another great feature that will allow us to change the fundamental frequencies of our bands. It gives the option to make a sound higher or deeper according to the taste. The best thing about it is that all of this is done without changing the pitch of the signal.
Unvoiced: This section deals with the volume of the noise generator and can also help with the brightness and clarity of the sound. The sensitivity control next to this acts as a dry/wet for the carrier and the noise generator.
Bands: With bands, we can set the number of filters that can affect our sound. More bands means a more clear sound.
Depth: This controls the amount of modulator amplitude envelope applied to our carrier signal. 100% is usually applied to obtain the results of classical vocoding.
Attack and Release: These controls adjust how the vocoder reacts to the dynamics of the modulator signal.
Precise/Retro: The default vocoder from the Ableton live provides you with two filters; Precise and Retro. Setting the filter to “Precise” mode results in a wider bandwidth. Retro filters can turn sounds narrower and louder.
Vocoders can be used with many different sources but tend to sound the best with vocals. We will see how you can use the Ableton Vocoder on vocals as well as drums.
Let’s get started.
How to use Ableton Vocoder on vocals.
There are two main steps to get started with the Vocoder in Ableton. But let us break down the process into steps so that you can understand it a lot better.
1- Add a track for your modulator.
As we have discussed above, the modulator is our vocal part and it is the first step to get started. In Ableton, you can add a vocal source by pressing CTRL + T. This will add an audio source in which you can link your microphone or a vocal clip as the input for the modulator.
2-Add track for the carrier
The carrier usually accepts a synth which can be done by pressing CTRL + SHIFT + T. This adds a new midi track to our timeline and you can apply the synth of your choice onto it.
Once we have tracks loaded for modulator and carrier, we are ready to add the Vocoder.
3- Add vocoder to the modulator.
Now, place the vocoder on the modulator track. You can do this by navigating to:
Audio Effects->Reverb and Resonance->Vocoders
This will apply the default vocoder but it will not provide the result that is required.
4- Change carrier type.
Now, change the vocoder type to external and select the audio from the synth you have chosen. This will take the input from the synthesizer source.
Now that you have all the inputs, the vocoder will do its magic and whenever you input from the modulator, you will notice the change in your sound.
5- Play with vocoder settings.
As we have explained different controls on the vocoder, you are free to play and tweak with them to produce the sound of your choice.
Using the Ableton Vocoder with the drums.
Ableton vocoder has plenty of uses other than the vocals. A lot of musicians use it to enhance the sound of drums with the noise oscillator present in them.
The noise carrier type thickens the drums with the white noise which gives them a stronger sensation. This aids a lot in the mixing and works amazingly well with the snares.
Let’s see how we can use the Ableton Vocoder with the drums.
There are different ways but we will be setting up Audio Effect Rack and run the vocoder along for our snare. Follow the following steps.
- Add a snare audio track and load a vocoder on it.
- After you have done this, press CTRL + G. This will group our device in the Audio Rack.
- We will be using two chains; one for the processed signal and the other for the raw signal. So, extend the chain list in the Audio Effect Rack and add a second chain in it.
- Make sure the carrier selected is noise. Using this will let the vocoder use its internal noise generator as a carrier.
- Now play the snare and listen to the results.
Conclusion
Ableton is a rich and powerful music creation software that features a rich vocoder. With the Ableton vocoder, you can not only give a funk to your vocals but you can enhance your simple snares and drums. Vocoders have a special place in music creation and learning more about them might lead you to discover your music style. We hope this article helped you learn about the use of Ableton Vocoder.
Author: Mike P
Hi! My name is Mike! I’ve been an apartment producer/musician for 10+ years. I’ve played in punk bands, released EDM tunes on Beatport and iTunes, and have a semi-successful stock music portfolio. Read more…


