When Live 10 arrived we were introduced to the Ableton CV Tools pack. This pack is a collection of devices that are used to interact with your modular Eurorack and CV-enabled hardware.
The CV Tools work much like hardware control voltage modules only these are software and require a DC-Coupled audio interface to work with your modular hardware.
Let’s take a deeper dive into what each CV tool does, shall we?
Other ways to connect your CV Hardware? Read more about connecting Ableton Live with your modular gear!
What Are Ableton Live’s CV Tools?
Ableton Live CV tools help connect your modular or CV-enabled gear to Ableton Live. With the help of a DC-Coupled audio interface Live is able to send and receive Pitch, Control, Clock, and Trigger voltage to your Eurorack hardware.
The CV Tools pack provides everything you need to integrate the digital world with the hardware world. There is a CV Instrument device for controlling your hardware oscillators and returning the audio. LFOs, clocks, and triggers are also included in the free pack.
In total there are 10 Max for Live CV devices; CV Instrument, CV Triggers, Rotating Rhythm Generator, CV Envelope Follower, CV In, CV LFO, CV Shaper, CV Clock In, CV Clock Out, and CV Utility.
Although Ableton is not the first DAW to introduce CV connectivity the Ableton CV tools are indeed promising. The Rotating Rhythm Generator and CV Utility can also work inside of your DAW without the use of a modular Eurorack system.
Where To Get The Ableton CV Tools Pack
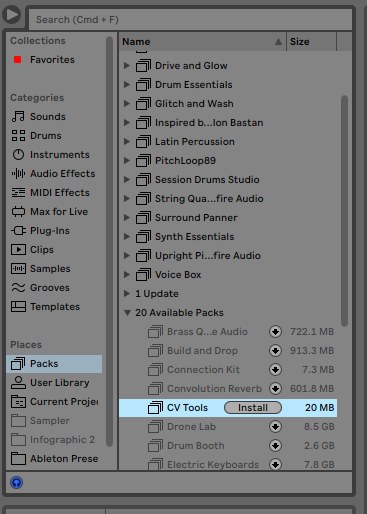
CV Tools is a free download for users of Ableton Live Suite version 10 or above. The CV Tools pack can be found in the Live Browser under Available Packs or users can log in to their account on Ableton.com to download the pack.
Will CV Tools Work With Your Audio Interface?
In order to use the CV Tools in Ableton effectively, you will need a DC-coupled audio interface. These audio interfaces have inputs and outputs capable of sending and receiving direct current (DC).
Most sound cards are only set up with AC-coupled inputs and outputs. These ins and outs filter out super low frequencies, which are the type of frequencies used in modular setups. This makes them inefficient for sending and receiving control voltage.
A few examples of DC-coupled Audio Interfaces are:
- Expert Sleepers ES-3 & ES-8
- Komplete Audio 6
- Motu Ultralite
- Antelope Audio Orion Studio Synergy Core
Learn more about our recommendations for DC coupled audio interfaces
Cables For DC-Coupled Audio Interfaces
You’ll want to make sure you use Tip and Sleeve (TS) cables when sending CV from your interface to your modular. CV inputs are usually mono and if you use TRS cables you will technically be shorting out the connection at the Ring to the Shield. This puts you at risk of damaging your audio interface.
Ableton Live’s CV Tools
Let’s take a look at what each of the CV Tools in Ableton Live do.
CV Instrument
The CV Instrument device is the workhorse of the CV toolbox in Ableton. This device controls gate CV and pitch CV. There are also envelopes to control the shape of the signal headed to your Eurorack.
CV Instrument allows you to shape the sound coming out of your modular oscillators.
Audio input at the end of the device is used to receive audio coming from your Eurorack rigs. This essentially means your Eurorack modular rig is housed in one easy-to-use Ableton device.
CV Instrument is placed on a MIDI track and can send MIDI from either the piano roll in clip editor or directly from a plugged-in keyboard controller.
When you add an instance of CV Instrument, you will be prompted to calibrate the oscillator you connect it to. This means the oscillator will play the note you play in Ableton Live.
CV Instrument is only compatible with bipolar +/-5V oscillator modules. If you have an oscillator that is unipolar +5V then CV Instrument will not be able to calibrate the oscillator.
CV Triggers
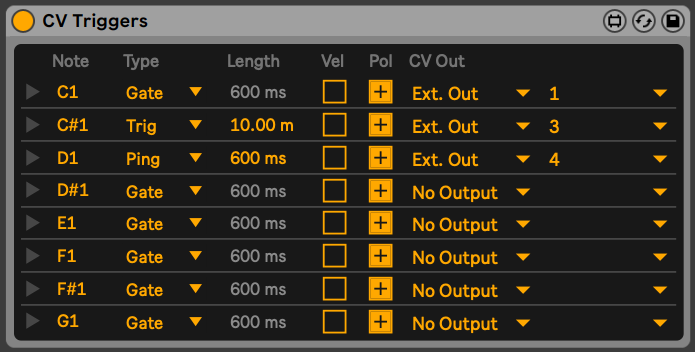
The CV Triggers device sends trigger control to your drum modules.
You can choose the MIDI note you want to use to trigger the module, and select the output to use for the control voltage.
There are 3 types of triggers; Gate, Trig, and Ping. Trig is a quick blip of control voltage to simply trigger a sound from your Eurorack. Gate will be open as long as the corresponding MIDI note is played. Ping sends out a short decaying control voltage to your drum modules.
The Vel tick box determines whether or not the trigger is sensitive to the velocity of the MIDI note played.
Rotating Rhythm Generator
This Ableton Live device is more of a MIDI generator, you can use this in tandem with CV trigger to send to your Eurorack.
The Rhythm Generator gives you 4 generators to create rhythms with. Each generator allows you to choose the MIDI note you wish to send as well as the velocity and length of the trigger.
In the timing section, you can choose the Division (1/4, 1/8, 1/16…), the Offset, and the Swing of the pattern.
Underneath the timing sections are parameters for Euclidian rhythms and Logic rhythms.
At the very end of the device are 4 Rotate buttons numbered 1, 2, 3, and 4. Clicking each button will shift the generators over by one. So clicking the “2” button will match the first generator with the second generator’s MIDI note.
CV Envelope Follower
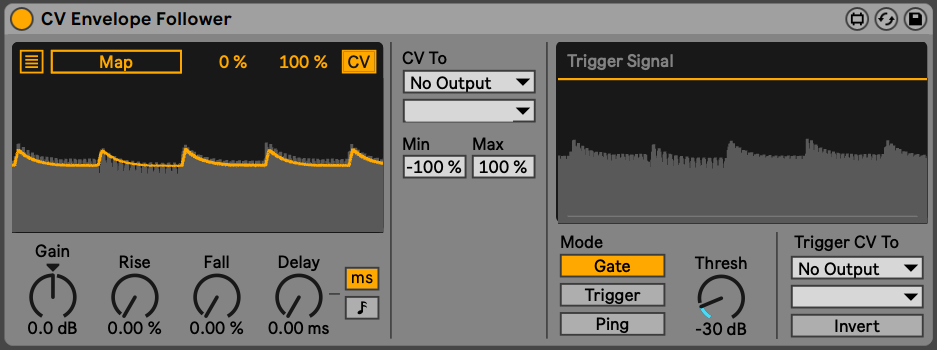
Envelope Follower will follow the audio of the device placed before it, or the audio from the track it is placed on. A CV envelope is generated from the shape of the waveform that is fed into CV Envelope Follower.
There are some parameters like Gain, Rise, Fall, and Delay to help control the shape of the follower. The signal created can also be routed to any mappable parameter in Ableton Live.
A trigger section is also included. Much like the Gate device, a threshold is set and once the input signal crosses the threshold a trigger signal is sent to your CV output. This could be useful for layering drums inside Ableton with sounds created from your Eurorack.
CV In
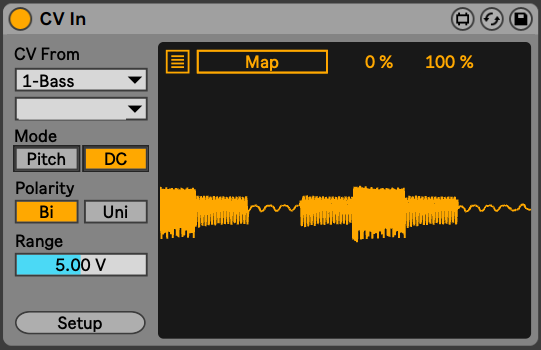
This device is pretty straightforward, CV In receives control voltage from your modular and it can be used to control other devices in the Ableton Live world.
You should use Pitch mode if you are not using a DC-coupled audio interface. If you do have such an interface, you can use the DC mode and select whether or not the input is +/- or just + then set the voltage range.
Once set up, you can map the control voltage signal to any automatable parameter in Ableton Live.
CV LFO
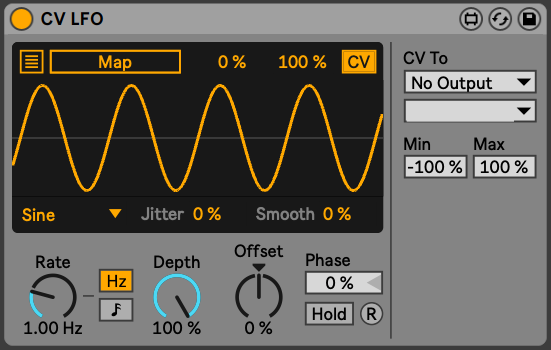
The LFO tool in the CV Tools pack allows you to send an LFO signal to your Eurorack. Standard parameters like Rate, Depth, Offset, and Phase allows you to tweak the LFO CV headed to your modular.
CV Shaper
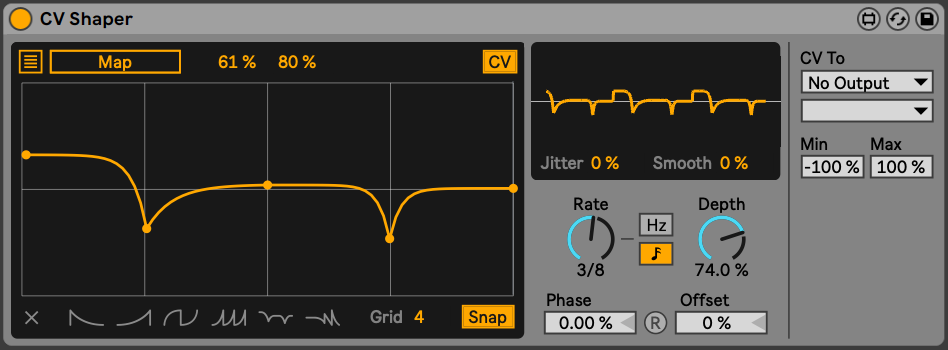
Shaping your control voltage has never been easier than with CV Shaper. This tool will send a pulsing CV signal to your Eurorack. You can shape it in the shaper window and you will see the pulsed signal in an oscilloscope view in the smaller window to the right of the shaper.
There are preset shapes to choose from or you can create your own custom shape. Set the rate and depth of the shape. Then select the output you want to send the CV to.
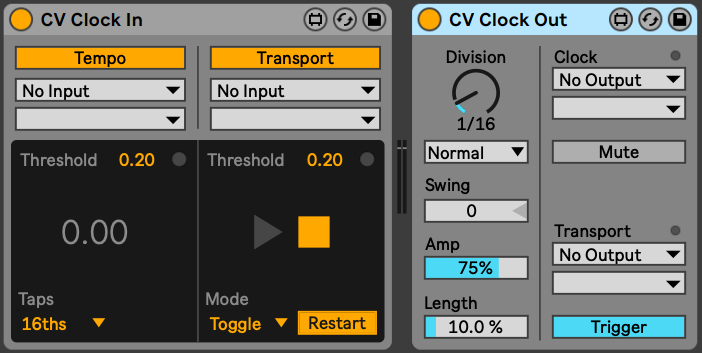
CV Clock In/Out
These devices are meant to either send a tempo signal from Ableton Live or receive a tempo signal from your Eurorack. Depends on which device you want to be set as the master tempo.
When using the CV Clock out, you control the tempo using Ableton Live. When using the CV Clock In device, Ableton will read the tempo from your modular setup.
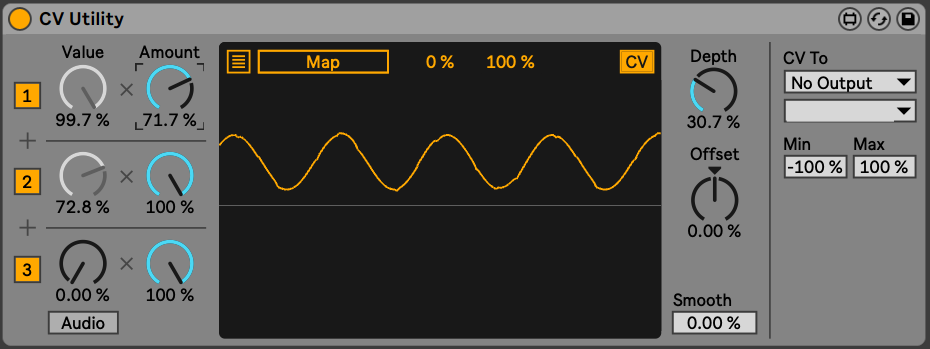
CV Utility
The CV Utility tool is a game-changer. CV Utility will take 3 CV signals or any control signal from another Ableton device. The signals are then combined to create one CV signal to output to your Eurorack or to any other automatable parameter in Ableton Live.
The Value parameter can be automated in Live’s Automation Lane as well.
This is one CV Device you can get creative with!
Author: Mike P
Hi! My name is Mike! I’ve been an apartment producer/musician for 10+ years. I’ve played in punk bands, released EDM tunes on Beatport and iTunes, and have a semi-successful stock music portfolio. Read more…
