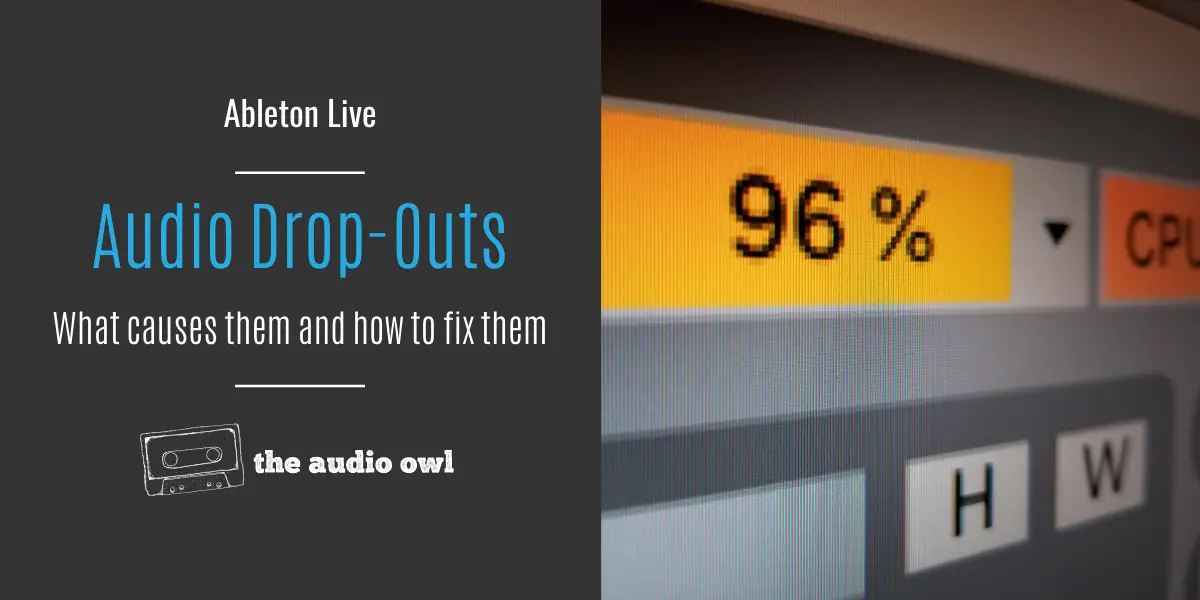
We’ve all been there, you just added your umpteenth instance of Serum or Massive and all of the sudden your computer sounds like it’s trying to remix you track before you even release it.
The stuttering audio makes it pretty well impossible to edit or record in your current session. So how do you fix it?
Ableton CPU Overload is a common issue amongst bedroom producers and usually the fix doesn’t require you to upgrade your production environment.
What Causes Audio Drop-out?
Audio drop-out occurs when your buffer time is not long enough, this is called a buffer underrun.
If the CPU does not have enough time to work on the audio within the buffer, then only the audio that was processed will playback. The audio that was not processed will not playback, creating a gap in the playback.
The speed of your hard disk also plays a role in audio drop outs. For example, if your hard drive is slow and you are trying to load multiple audio files at the same time, then your hard drive might not be able to load the audio fast enough for the buffer. This also creates a gap in the playback and leads to drop-outs.
Thankfully there are some pretty easy fixes for audio drop-out in Ableton Live.
Ableton Live Minimum Requirements
The first step you should take when experiencing audio drop outs in Ableton is to make sure that your system meets the minimum requirements.
For the most up to date requirements check the Ableton website.
Here is a quick screenshot of the current requirements for Ableton Live 11 and Live 10:
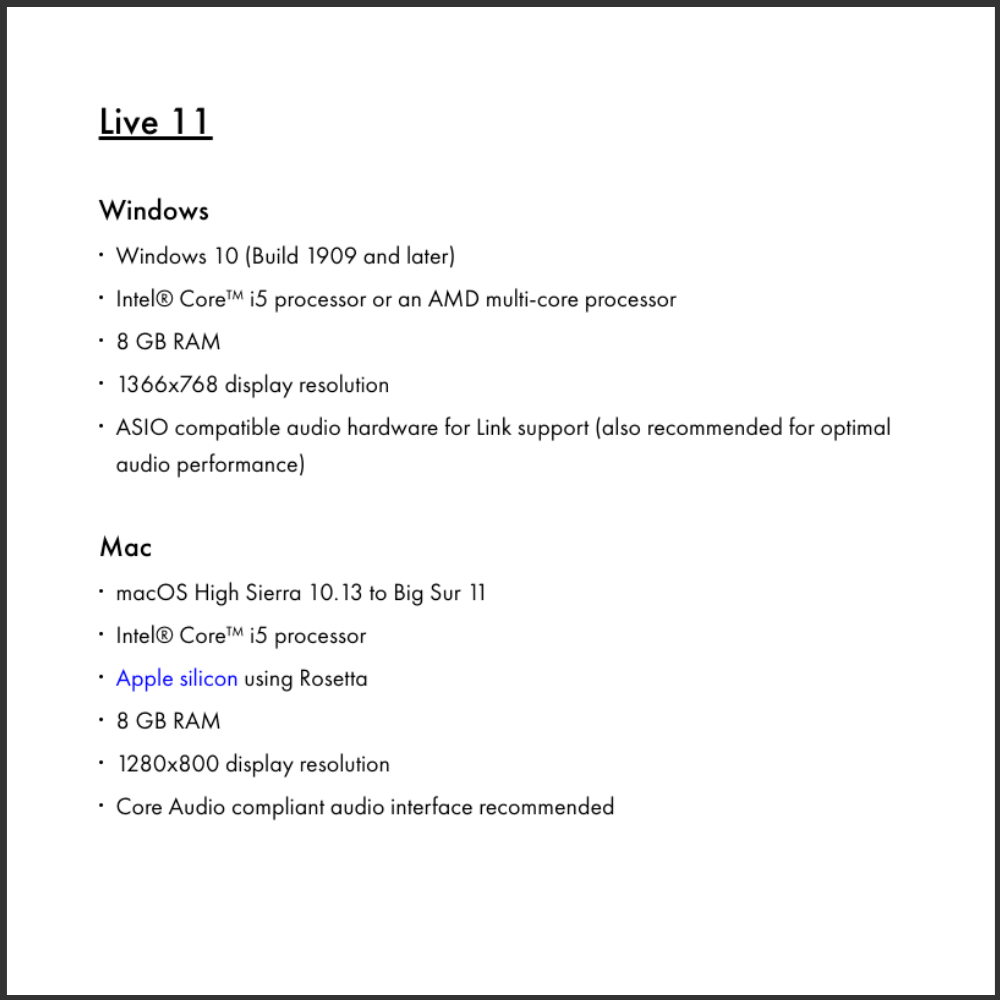
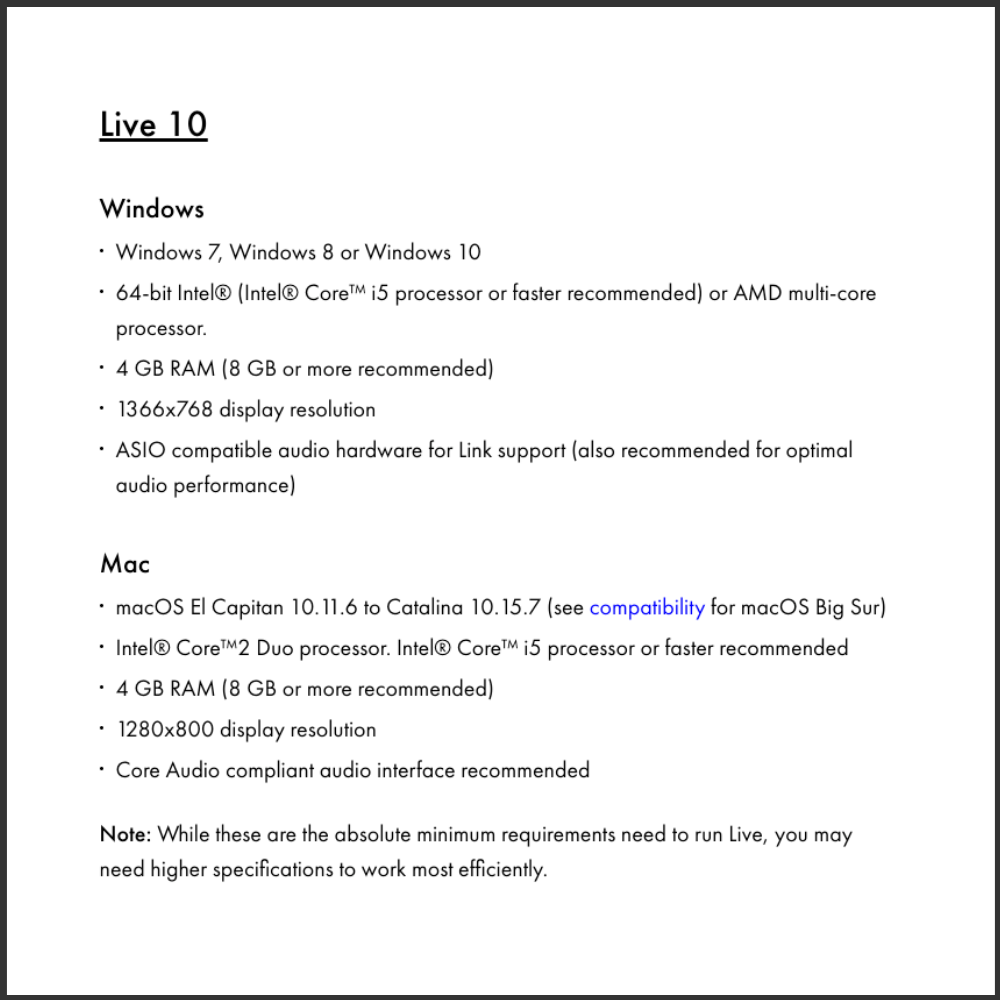
You should also note that the minimum requirements are just that, minimums. Running a computer with higher specs will allow you to work more efficiently.
What is Buffer Size and Sample Rate?
Buffer size and sample rate play key roles in remedying your audio drop-out and playback issues.

Buffer Size
Your computer needs time to process any audio you are trying to play, the time required is called a buffer.
A buffer adds latency to your audio playback. Giving your CPU time to process any added effects or changes before the sound is played.
Think of the buffer size as blocks of audio. The length of each block of audio is determined by the specified buffer size.
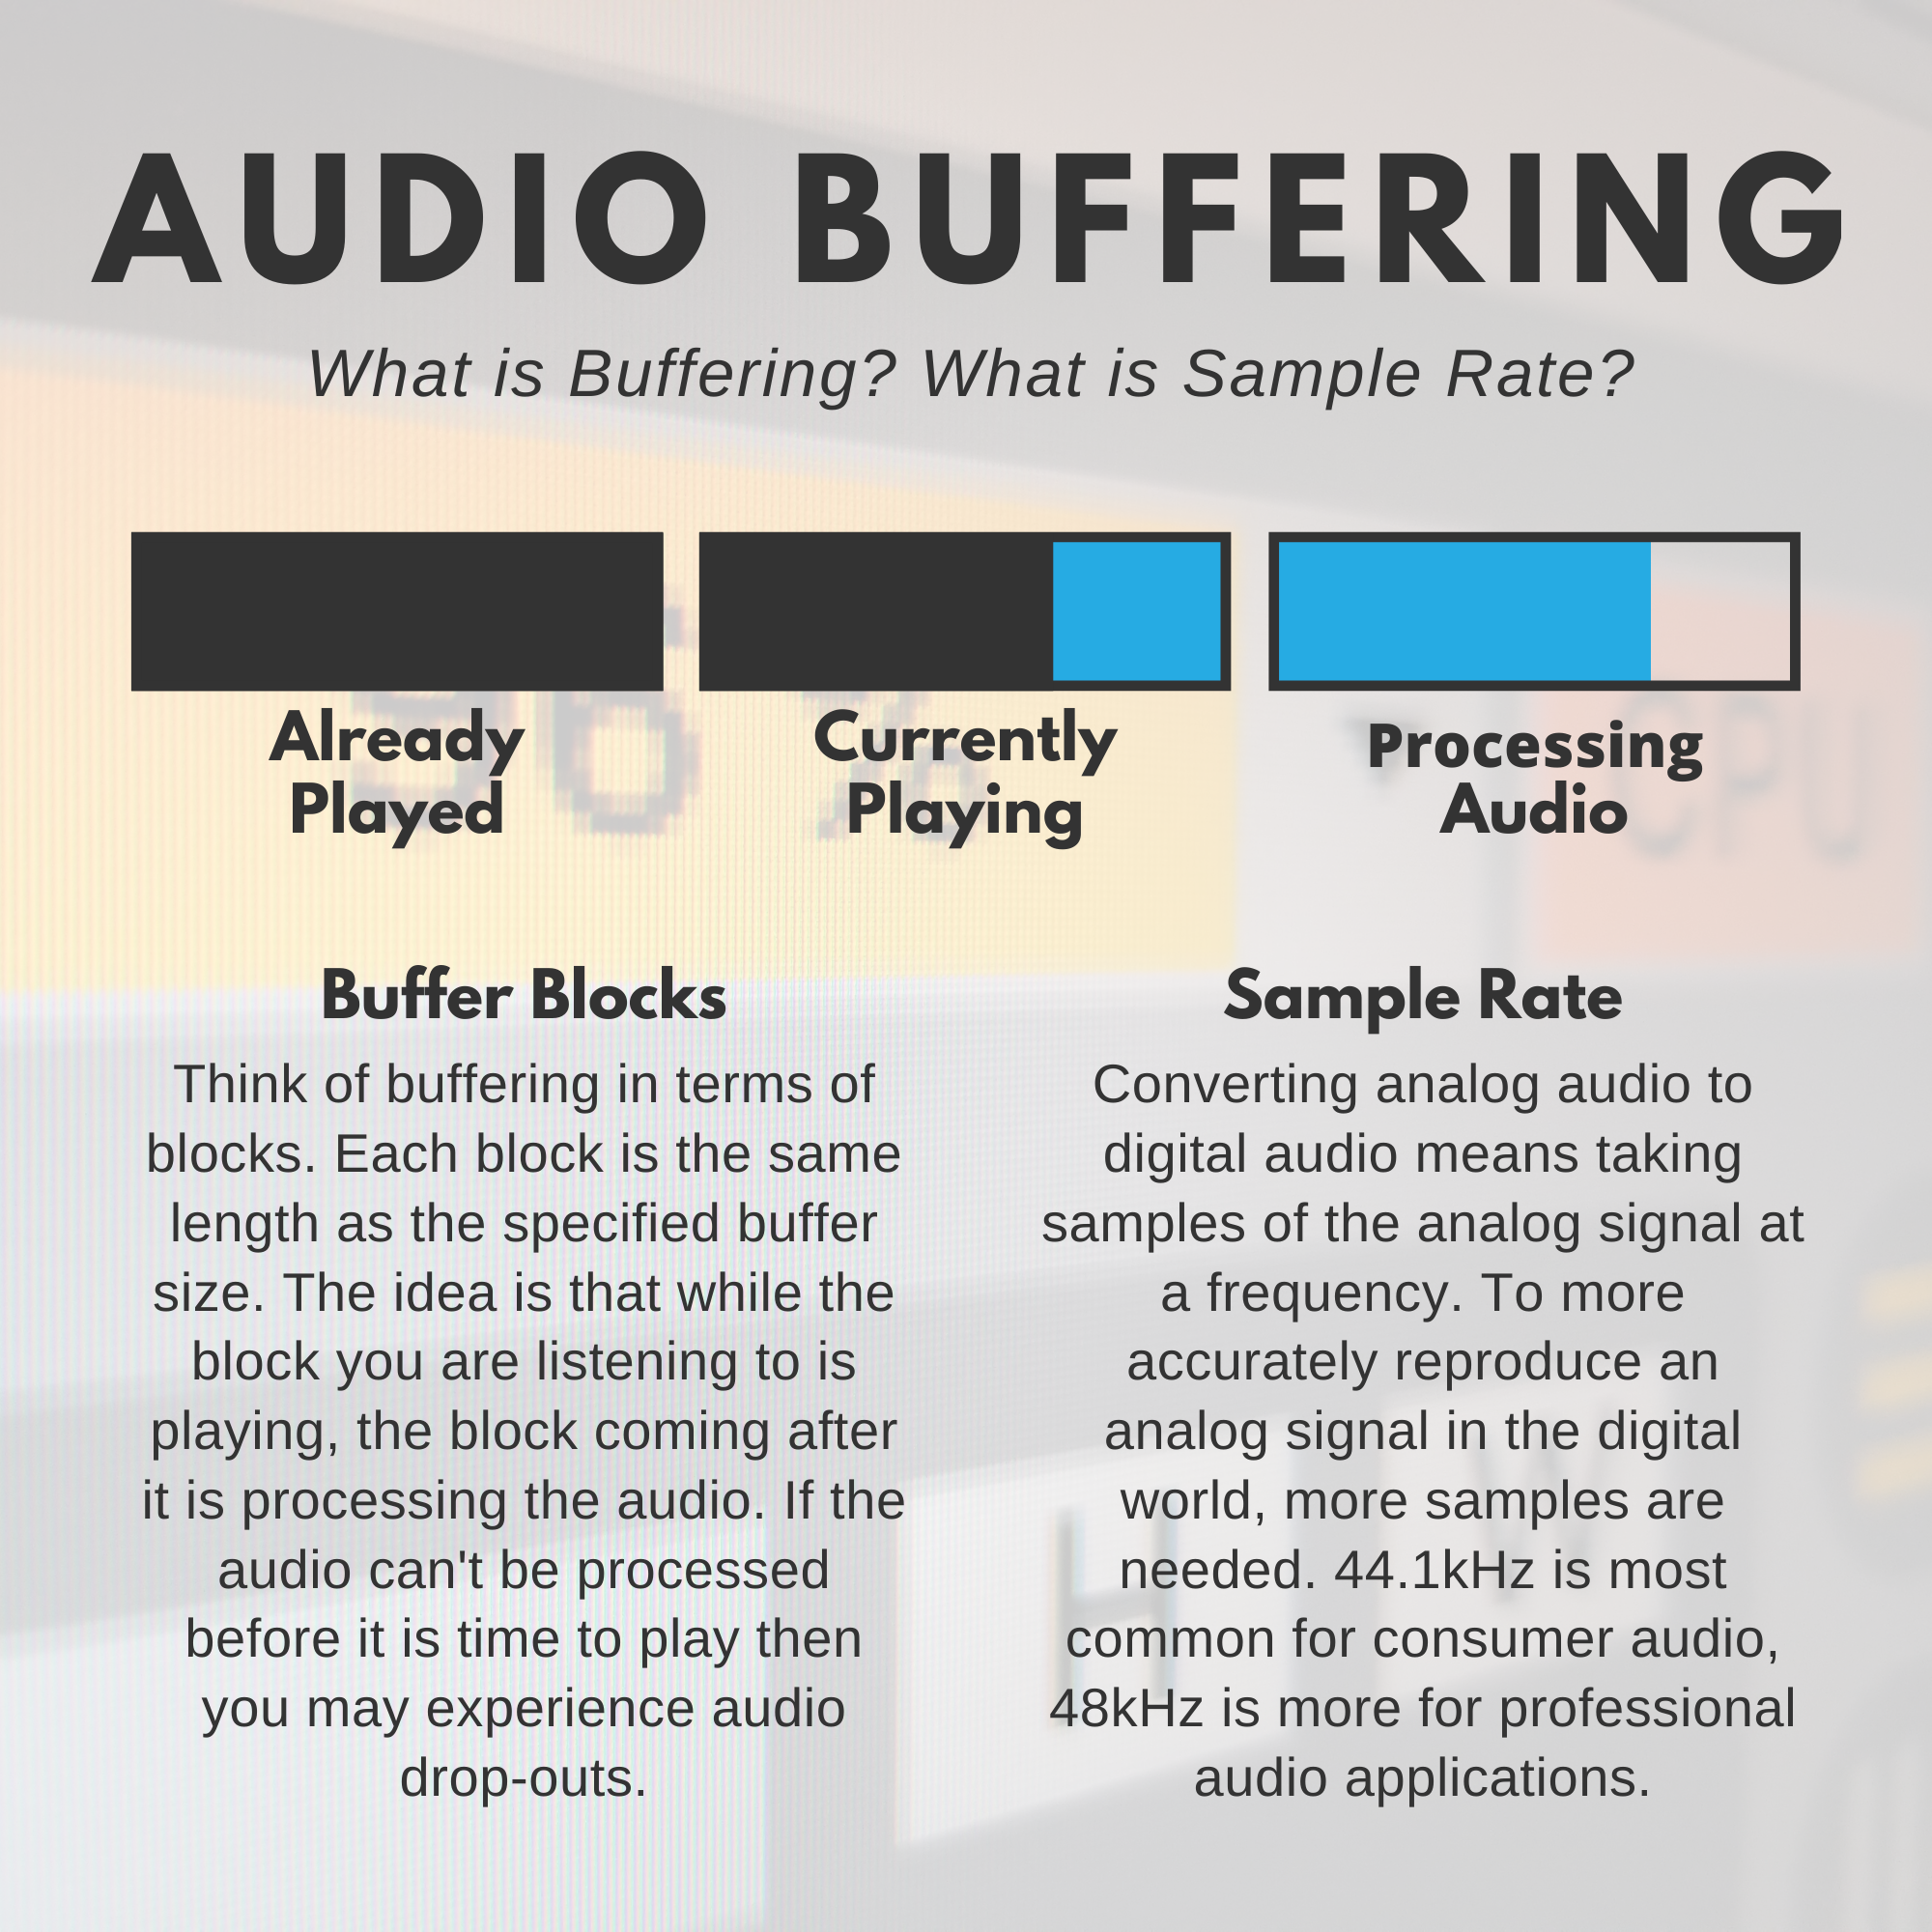
When you press play, there is a small amount of latency before you hear the audio, this is the time it takes for the first buffer block to be processed.
Now that the first buffer block has begun to play, the next buffer is being processed. Once that one is finished processing it is ready for playback and the next buffer will begin processing.
Sample Rate
Audio sample rate determines how many samples of the audio are taken per second. A digital signal is not as smooth as an analog signal, meaning that it represented by samples of the original audio.
To more accurately reproduce an analog signal in the digital world, more samples are needed. Thus, the higher the sample rate, the closer representation of the original audio.
Most DAWs will give you the option of using either 44.1 kHz or 48 kHz. 44.1 kHz is more common for consumer audio applications and 48 kHz is used when producing audio for video or professional audio applications.
How To Fix Audio Drop-outs in Ableton Live
In order to fix audio drop-outs in Ableton Live you need to do one of 2 things. Increase the size of your buffer, or reduce the processing time of your project.
The following 3 fixes are the most likely to reduce audio drop-outs during playback.
Increase the buffer size
Increasing the buffer size in Ableton will all your computer to have more time to process the buffer block. This method will also increase the latency of your project.
You should choose a buffer size that is just above where the drop-outs begin, this will give you some extra room incase your CPU load increases.
Freeze Tracks
If CPU usage is an issue for your system, you should always freeze tracks where you can. Freezing tracks essentially bounces the track to an audio file instead of running all of the plugins live.

This saves a ton of CPU power because all of the plugins on the track have already processed the audio before playback.
So if you are not working on a track and it is causing issues then freeze it, you will always be able to unfreeze later if you need to make changes.
Turn Off Plugins
Turning off plugins that are not in use will also help reduce the CPU load during processing. If you have some tracks that are turned off or not in use, consider turning off the plugins on the track.
Tips For Improving Your CPU Usage In Ableton
If the fixes above did not work, it is likely that you will need to reduce your CPU usage further. The tips below will give you the extra boost you need to solve your drop-out problems.
Lower The Sample Rate
Choosing your sample rate should be done before you start working on your project. Changing sample rates mid way through your project could affect the way it sounds.
Standard consumer audio is usually at 44.1kHz and professional audio is at 48kHz. So, if your project can afford to, you should use 44.1kHz as your sample rate.
Working with a lower sample rate will save a bit of CPU as there will be less samples to process.
Using Buss Tracks
You can save some CPU if you have a few tracks using the same plugins and settings. Load the plugins on a buss track instead and then route the audio/midi tracks to the buss.
Working this way means you have less plugins overall and therefore less CPU load.
Disable Ins and Outs You Don’t Use
Turning off input and output channels you are not using will save CPU as well. Open up the Preferences menu, in the Audio tab check your inputs and outputs. Turn off any you are not using. If you’re not recording you likely don’t need any inputs on.

Also, if you are monitoring using outputs 1 and 2 then you can turn any mono or additional stereo channels off.
Close Background Programs
Sometimes you might have another computer program running that eats up a lot of CPU. Chrome is one of the most common programs you can close to free up CPU.
When producing it is good practice to close any other programs you are not using.
You can use activity monitor on a mac to see which programs are the biggest CPU hogs and close them.
That way all of the freed up CPU can be used in Ableton.
Use Beats As Warp Mode
If you are warping tracks in Ableton it is better to use Beats, Repitch, or Tone as your warp mode. The Complex modes eat up 10x more CPU that the others.
When you are not warping tracks, make sure that warp is turned off on the audio clips.
Sometimes you just need to use one of the Complex modes of warping, like on a vocal. In this case use Complex to warp the audio clip, then bounce the clip to a new file and turn off warping.
Saving CPU With Reverb
Ableton’s Reverb device has a quality setting that lets you toggle between different modes. Switching your reverbs to ECO mode when producing will lower the quality of the reverb but also lower CPU usage.
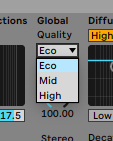
When you are ready to export your project, turn the Quality setting back to HIGH.
EQ Eights CPU Savers
You will likely have a ton of EQ Eight devices loaded in your project. Did you know they can be quite CPU intensive?
The spectrum analyzer uses additional CPU, so if you are not using it you can turn it off. Turning off any filters that are not in use will also reduce the CPU usage of your EQ’s.
Load Audio With RAM
If you are getting a lot of Disk Errors on the CPU Monitor, then you might want to consider loading some of your audio files from RAM instead of your hard disk.
You can do this by turning on the RAM setting in the audio clip settings.

Turning off the HiQ setting will also save you some CPU. Just remember to turn it back on before export. It helps with sample rate mismatches.
More Quick Tips To Save CPU In Ableton
Here are a few more tips that can help you save some CPU power in Ableton.
- Keep around 10-20% of your hard drive space free
- Turn off WiFi and Bluetooth
- Use 24bit or 16bit audio
- Reduce the polyphony on your softsynths
- Turn off unused filters or LFO’s in your devices
Author: Mike P
Hi! My name is Mike! I’ve been an apartment producer/musician for 10+ years. I’ve played in punk bands, released EDM tunes on Beatport and iTunes, and have a semi-successful stock music portfolio. Read more…