Ableton Live comes with a state-of-the-art automation workflow. One of the many advantages we enjoy as music producers in the modern age is automation. Every daw has some form of automation and almost all modern synthesizers and mixers can be automated.
Our predecessors had to move actual knobs at exactly the right time while recording. Fortunately, we have red lines and dots that do that for us.
In this article, we’ll cover how Ableton Live uses automation to breathe life into your mixes.
What is an Automation point?
You’ll find Ableton’s automation lanes in the arrangement view. When automation mode is on, a red line will be overlayed on top of the track.
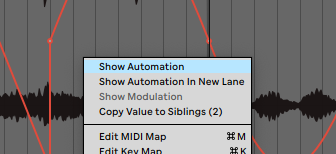
Right-click on any parameter; panning, volume, filter cutoff, or gain knobs will do. Select “Show Automation” and the track will show the red automation envelope for that parameter.
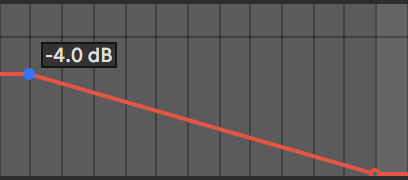
First, what you need to do to automate a parameter is to add a point to the red line. Then drag that point until your desired value shows up in the little counter right of the dot.
This is an automation point.
We use these to structure our automation curves and create movement in our songs.
Automating Parameters
With automation curves, you can change the value of almost any parameter over time. This is what makes automation useful. The simplest way to do that is to create two points at different values on the automation curve.
By adding two automation points, one higher or lower than the other, you’ll get a straight angled slope.
Play your track and you’ll notice the parameter change as the playhead moves across the automation slope.
Automation Shortcuts
There are a few helpful shortcuts built into Ableton that will help you with your automation. Let’s see what they are!
Looking for more shortcuts? Check out our list of the most helpful Ableton Live Shortcuts for improving your workflow.
Turning On Automation Lanes
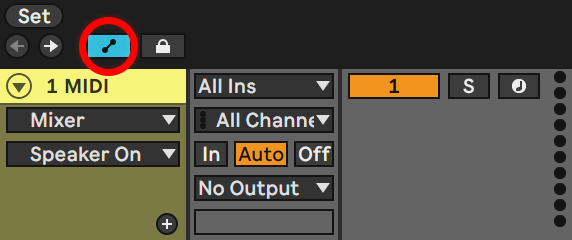
The first shortcut that comes to mind is the A key shortcut. It allows you to go into “Automation Mode” instantly. After pressing the key you’ll see this icon light up which means you are all set for automation.
Introducing Curves
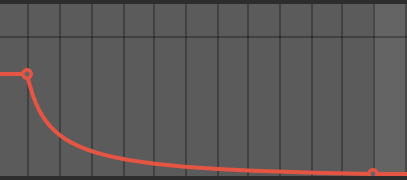
The straight automation line will work just fine for automation, but sometimes it’s a bit too stale and lifeless.
To have the automation flow in a more natural way, hold the ALT key and drag the sloped line. This creates a curved line that will sound more natural and less calculated.
Finer Resolution
Try adding an automation point to an envelope on your track.
While moving the automation point up or down you might notice the value is hard to dial in.
By holding down the SHIFT key you’ll get what’s called a “finer resolution for dragging”. This feature will make you much more precise when dialing in the position of your automation point.
An alternative to this shortcut is to make the track taller. This gives you better control over your values, much like how a youtube video in full-screen is easier to navigate.
Copying Automation Curves
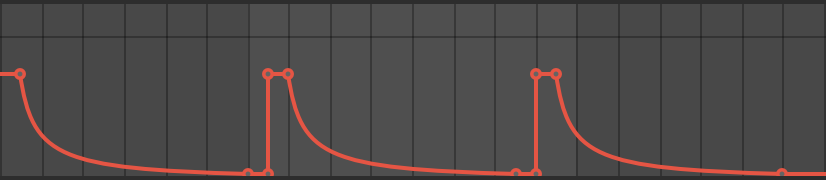
Let’s say you have an automation curve you would like to copy or duplicate. Highlight the section to copy and use CMD+C to copy. Use CMD+V to paste the automation curve.
You can also use the shortcut SHIFT+D to duplicate the automation you highlighted. This will place a duplicate of the curve directly after the highlighted section.
Deleting Automation
If at any point you aren’t satisfied with a group of automation points you can delete them. Highlight the points you want to delete and press CMD+X to easily delete them.
If in turn, you want to delete all of the automation points in a track, use the shortcut CMD+Backspace. This will delete all automation on the selected track.
Shifting Automation
Let’s say you have a curve that you are happy with, but you wish the automation points were higher in value.
Instead of moving each point manually, highlight each of the points you want to shift. Hold the SHIFT key and drag the selected points up or down.
Automation Step Sequencers
Sometimes in our production, we might wish to create a step sequencer automation. You might think this would take so long that by the time you finished you would lose your creativity.
In Ableton Live, it’s very easy to create step-sequencer automation. First, make sure the grid is set to the length of the steps you want. Then, just use the shortcut B to access the draw mode and you can draw step automation all day long.
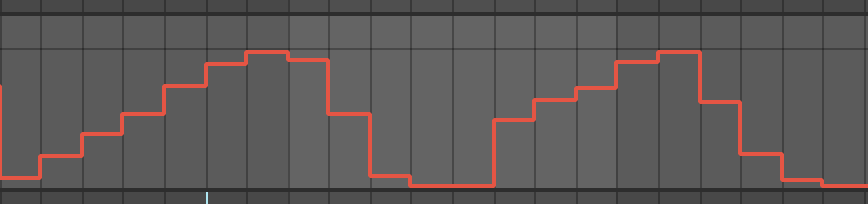
The draw mode can do more than just draw steps though. If you hold down the “alt” key you can draw automation like you would with a pencil!

Recording Automation
While manually placing your automation points might be the most obvious way of automating. There is an easier way!
Ableton Live has one of the best MIDI recording capabilities of any daw which makes recording automation a cinch. You can link a knob or fader from your MIDI controller to the parameter you want to automate.
To record the automation into Ableton you have to make sure your “automation arm” button is enabled. After that hit record and “play” the automation just as if you were recording an audio take.
Every manual change made while Ableton Live is recording will appear on the automation envelope.
You can use your MIDI controllers, keyboards, or simply your mouse to make manual changes in Ableton Live parameters.
The coolest thing about this is that after recording you can manipulate your recorded automation and do corrections if needed.
Automating MIDI CC
Ableton Live, like the automation machine it is, hides another powerful method of automation.
Automating MIDI CC allows you to create automation inside of your MIDI clips. You can create curves for the pitch-bend, the modulation wheel, or even portamento time.
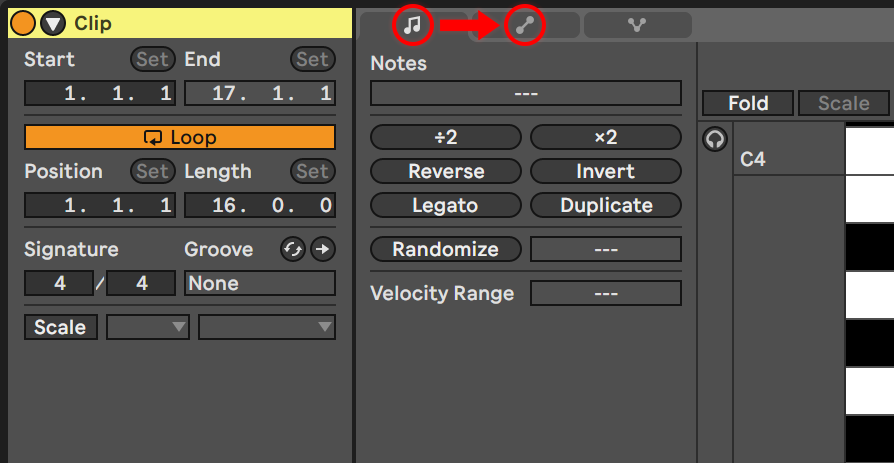
To start automating MIDI CC you first have to make a MIDI clip. Then in the MIDI clip, you switch from the “note icon” to the “automation icon”.
Now you can automate any MIDI value from 0-127! The envelope you draw on will be located inside the piano roll and is specific to that MIDI clip.
Conclusion
Automation changed music production and Ableton Live has perfected automation. Use these tips to up your music production game!
Author: Nadir
Hi there, my name is Nadir aka Nadrisk. I’ve been a bedroom music producer for 8+ years. I do everything in the box and I use Ableton Live as my weapon of choice. Apart from music production, I do mixing and mastering, audio/video editing, and sound design.
Listen to Nadrisk Here